Creating and Configuring the Twitter App #
To create and set up the Twitter App for the AutoPoster plugin, follow these steps:
Configuration of the Twitter App for the AutoPoster plugin requires the following steps:
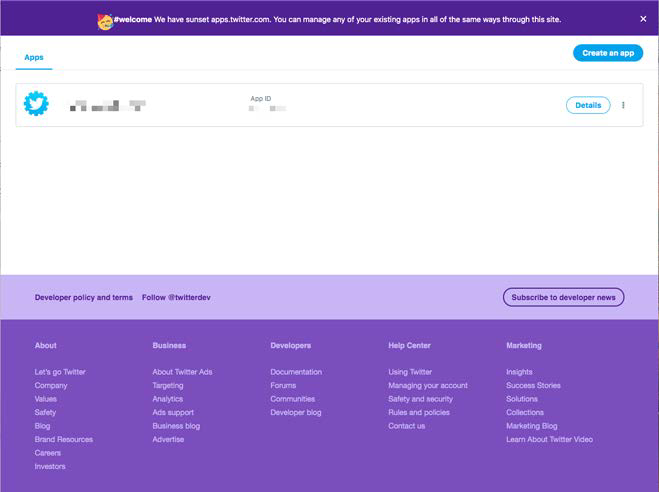
Go to this link address: https://developer.twitter.com/apps and click the Create an App button (See pic 1).
Pic 1
If you are creating your first App, follow the instructions for sending a request to obtain developer rights as described in this guide. If you have already obtained those rights, proceed with this guide.
After clicking the Create App button, you will be directed to the App details section, where you’ll need to complete all the mandatory fields:
A. App Name – Name your App.
B. Application Description – Describe your Application.
C. Website URL – Specify the URL of your website.
D. Callback URL – You may skip this field.
E. Terms of Service URL – This is a mandatory field.
F. Privacy Policy URL – This is a mandatory field.
G. Tell us how this App will be used – Describe how you plan to use the app. Mention that you will use the App to automate the process of sending tweets from your website to your personal Twitter account page.
The App will be created and ready for use.
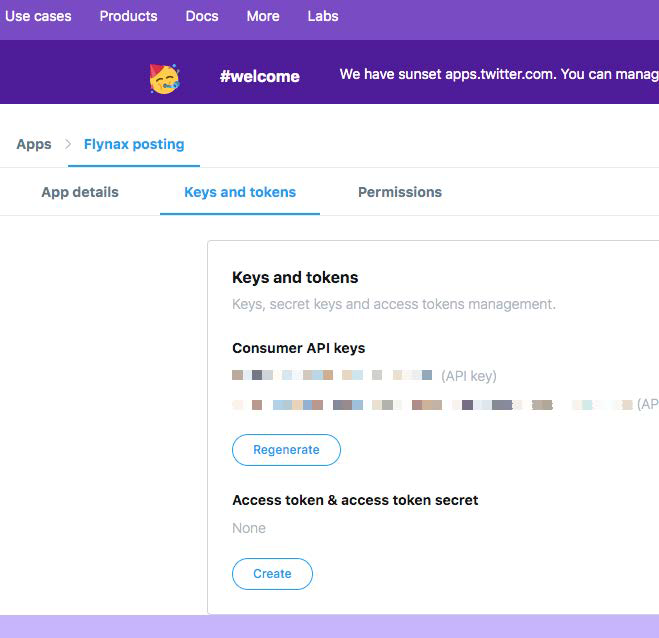
In the Keys and Tokens tab (See pic 2) of your App, you will find the required keys for the AutoPoster plugin. If you don’t have the Access Token and Access Token Secret, click the Create button.
Pic 2
Copy the API Secret Key, Access Token, and Access Token Secret, and paste them into the appropriate fields of the AutoPoster plugin manager. Once you do this, the plugin will be set up and ready for operation.
If you want to add a message to your Tweets, you can configure the Automatic Post Pattern for each category or the main category (See pic 3).
Pic 3

Afterward, your Twitter posts will be generated dynamically based on the fields you have previously selected.
Applying for a Twitter Developer Account #
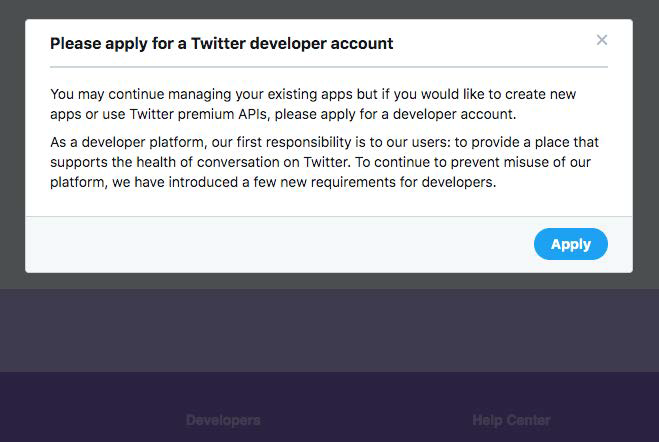
If you see a pop-up message saying Please apply for a Twitter developer account (See pic 4) after navigating to the following link: https://developer.twitter.com/en/apps/, follow these steps:
Pic 4
Click the Apply button, which will take you to a request page.
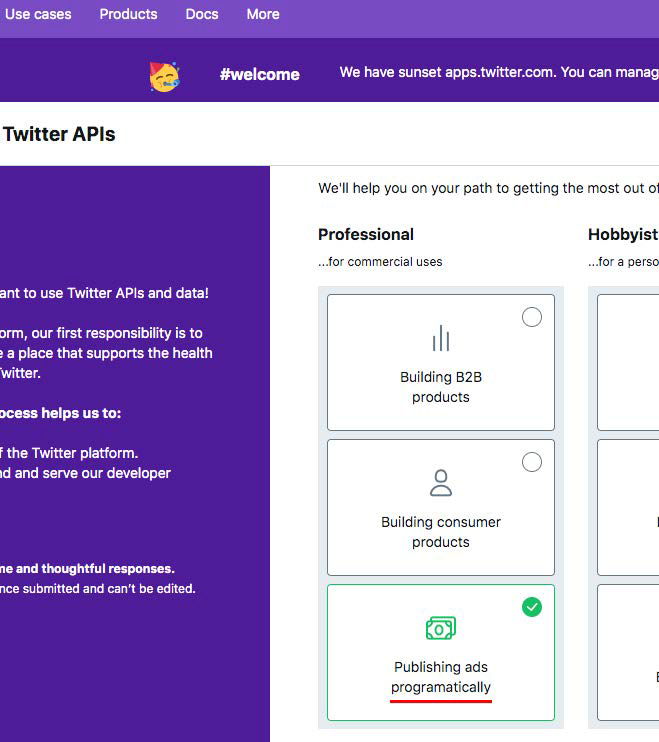
On the next page, choose the Publish ads programmatically option (See pic 5) and proceed to the following page.
Pic 5
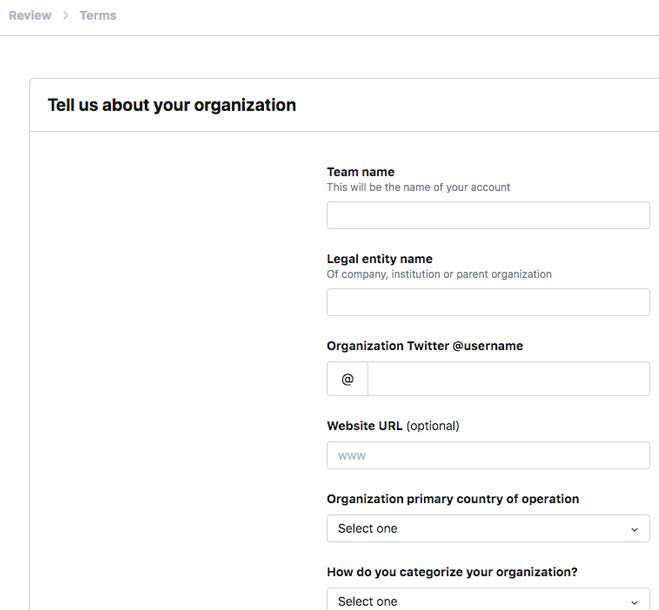
When you reach the step Tell us about your organization (See pic 6), make sure to fill out all the fields. In the How do you categorize your organization field, specify a category linked to IT technologies or e-commerce platforms.
Pic 6
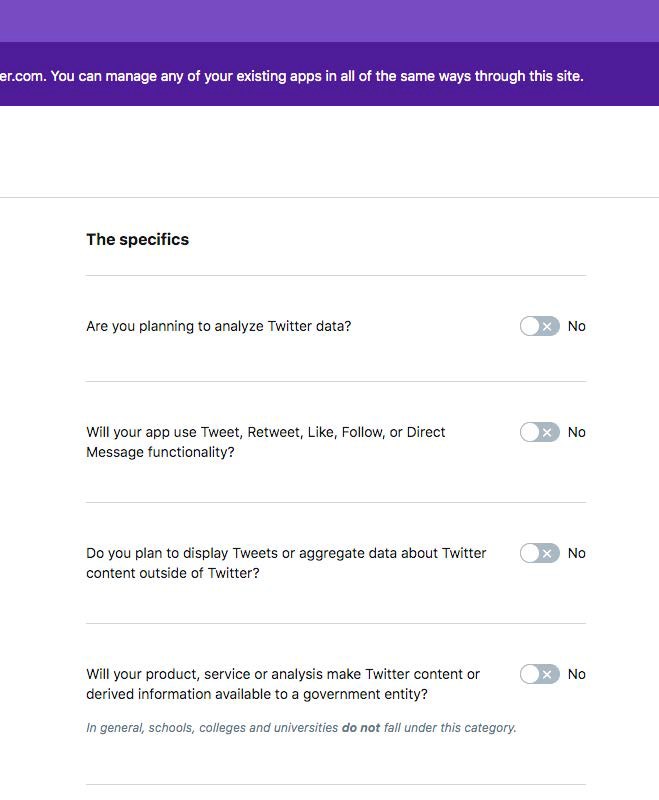
Proceed to the next step, How will you use the Twitter API or Twitter Data (See pics 7.1 and 7.2). Make sure to specify how you will use the created Apps and why you need a developer account. When describing your needs for a developer account, mention that the Apps you create will not collect any user information and will be used solely for the purpose of automatically posting ads to your personal Twitter account page (belonging to the creator of the Apps). In the specifics group, enable the only option: “Will your app use Tweet, Like, Follow, or Direct Message functionality.” After enabling this option, you will see a field where you need to describe how you will use the functionality of sending tweets to your page. After filling out the fields described above, you can proceed to the next step.
Pic 7.1

Pic 7.2
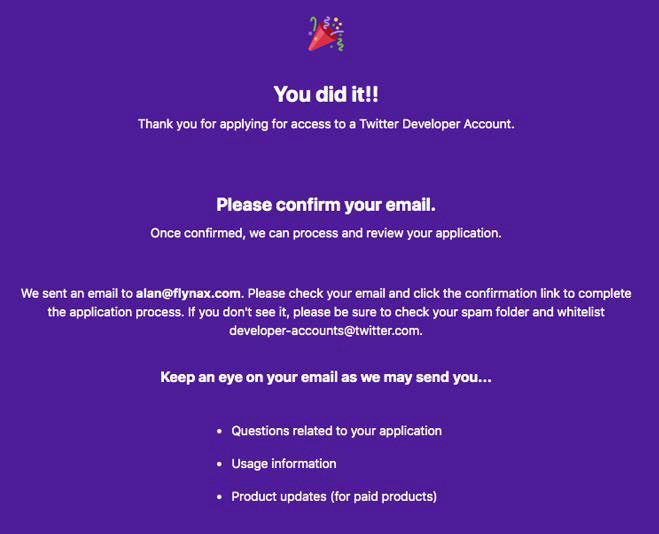
The next-to-last step will require you to review all the information you provided and confirm its accuracy. Once you do that, you will see the following image (See pic 8), indicating that your request has been accepted and is pending approval. On average, the approval of your request takes two to three working days, during which the Twitter Team may contact you with a follow-up email to clarify any remaining questions. If your App is approved, your account will be upgraded to a developer account, allowing you to create and manage Apps.