The OpenAI plugin allows you to use artificial intelligence to generate descriptions for ads on your classified ads site or marketplace. This means that OpenAI will write a description for a user’s ad using the basic data that the user enters in the fields when adding his listing. In layman’s terms, the user enters the minimum amount of data about his product, and the AI expands it. This saves time and allows for more advanced text in terms of marketing and SEO.
This guide will help you set up the OpenAI plugin on our Classified Ads Software to automatically generate ad descriptions using artificial intelligence powered by the OpenAI platform.
OpenAI plugin installation #
Go to the admin panel of your site and install the OpenAI plugin. After installing the plugin, you will need to connect it to the OpenAI platform by creating an account (if you don’t already have one) and obtaining an API key.
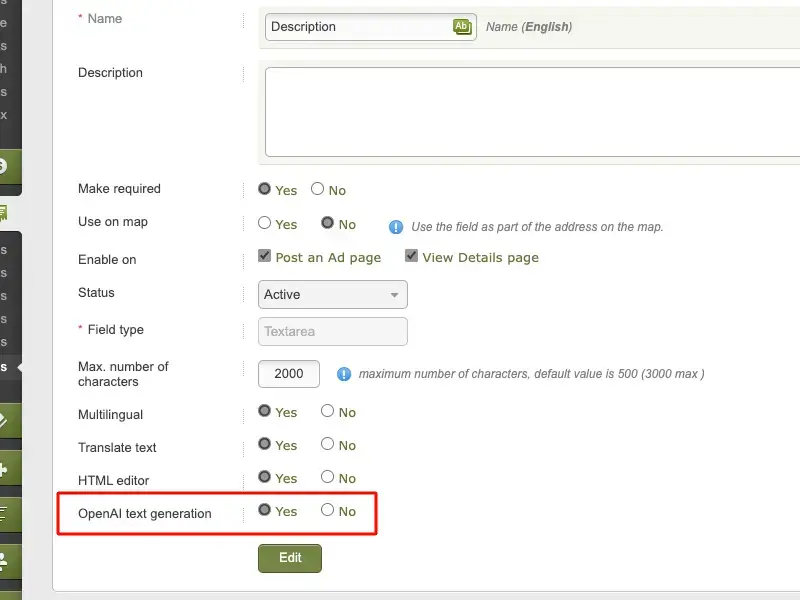
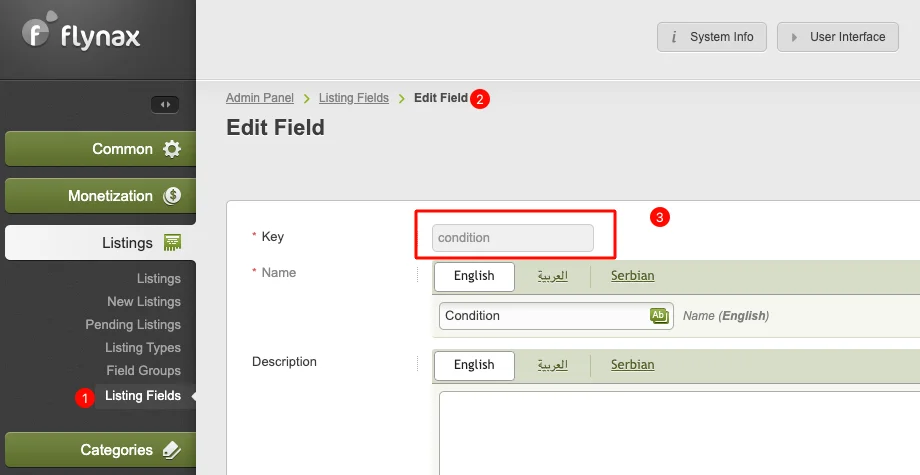
To enable the OpenAI text generation option for the Description field you will need to enable it from the Admin panel > Listings > Listing Fields > Edit the Description field > Enable ‘OpenAI text generation’.
Pic. 1
Creating an OpenAI account and getting an API key #
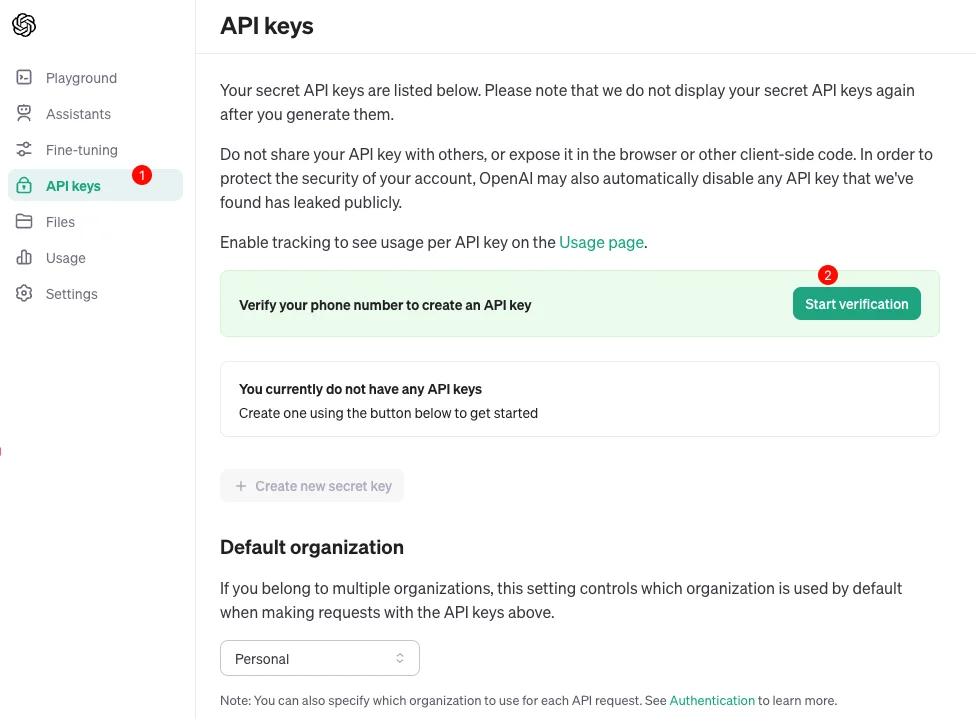
To create an account go to https://platform.openai.com/login?launch. If you already have an account, log in.
Then go to the Developer Area – https://platform.openai.com/docs/overview. Select API Keys in the sidebar and go through the verification process by clicking the Start Verification button.
Pic. 2
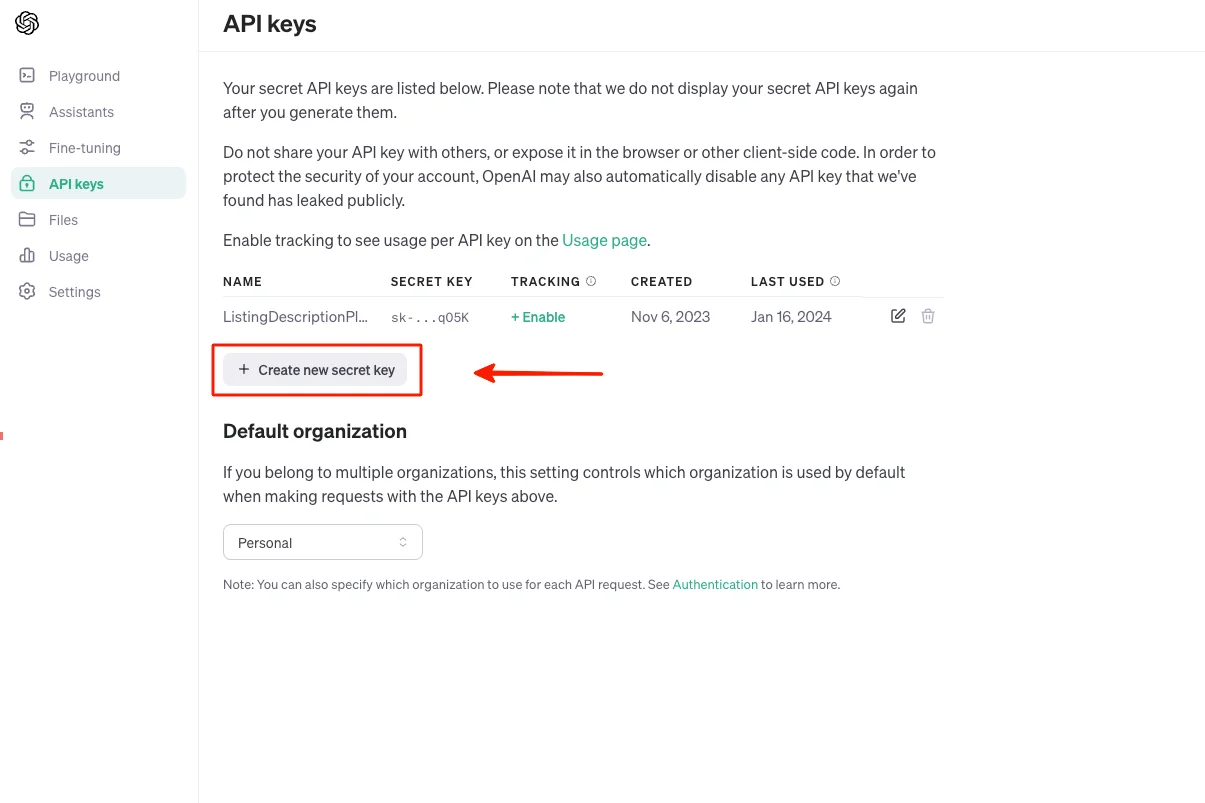
Pic. 3
Pic. 4
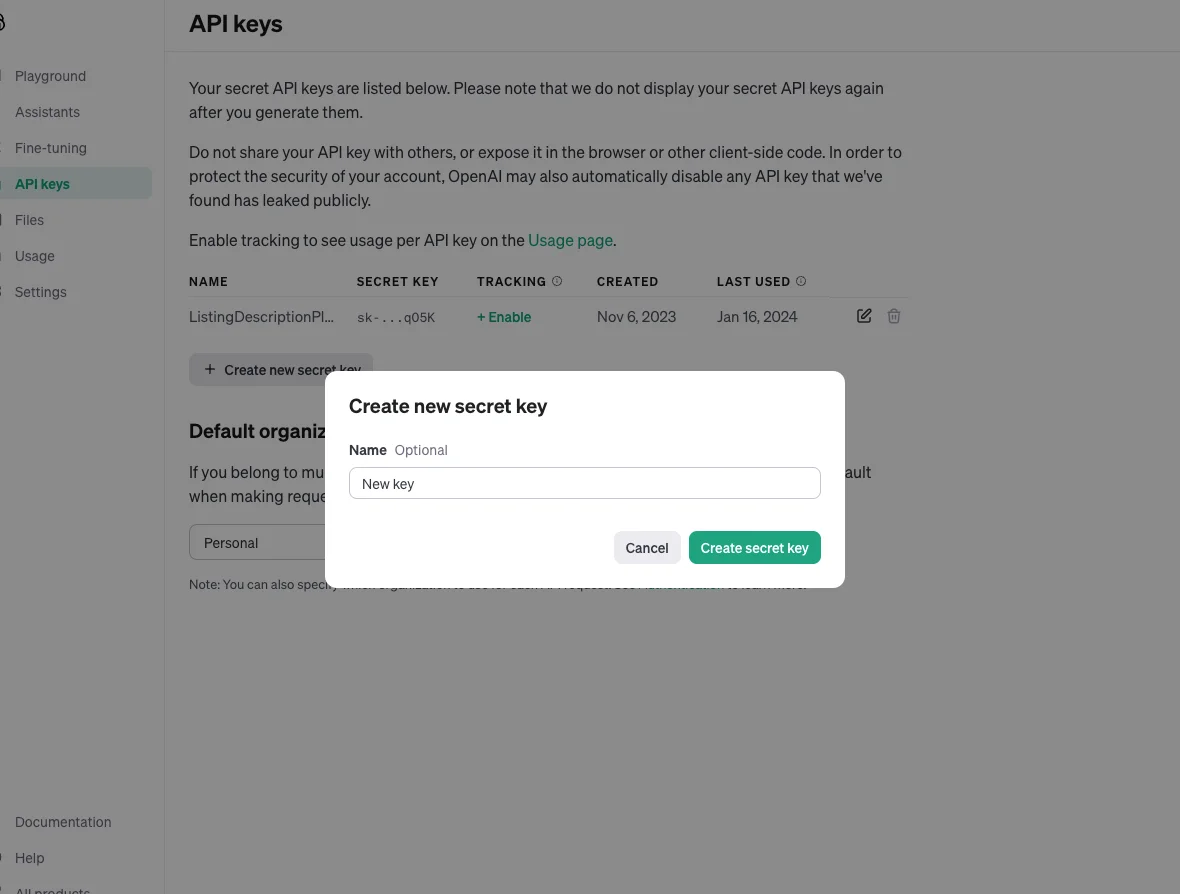
Pic. 5
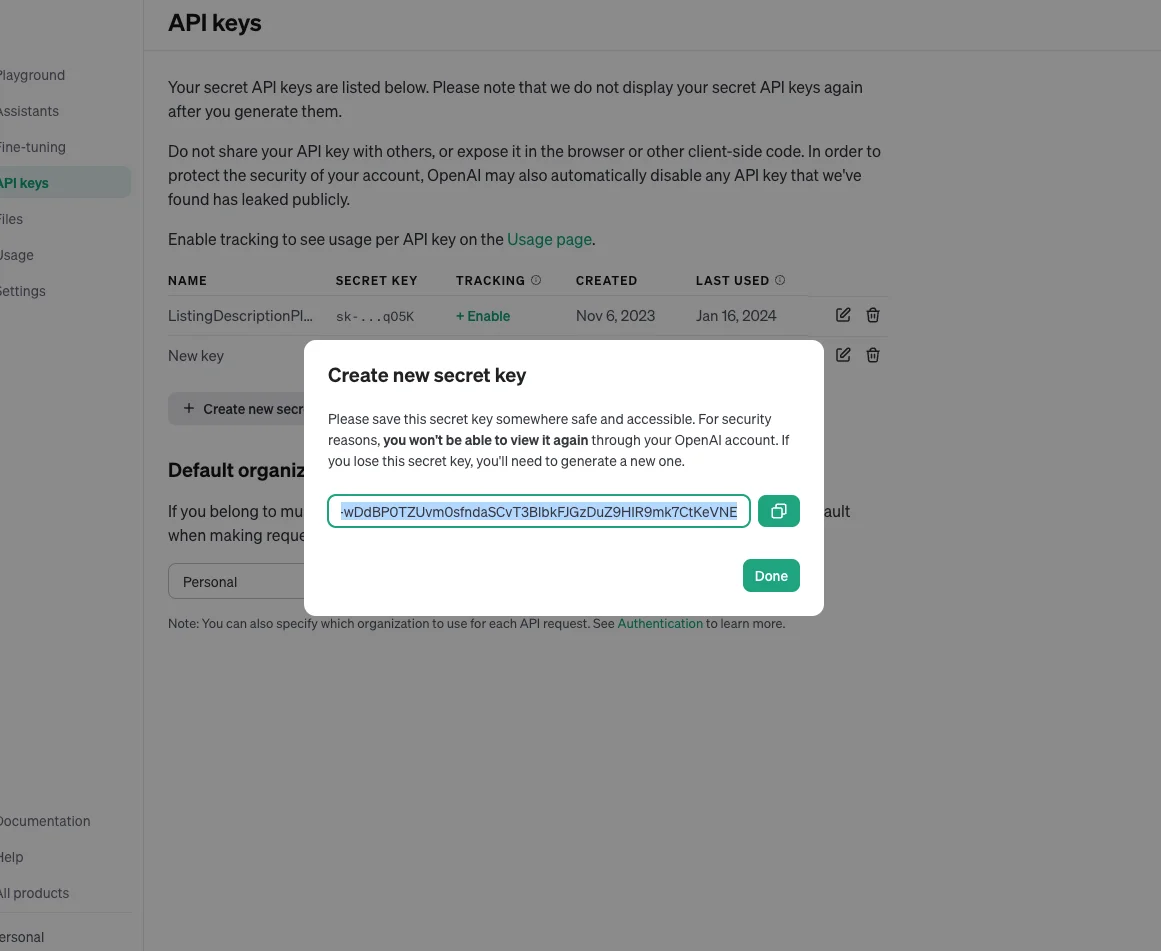
Copy the Secret Key and go to Admin panel > Basic settings > OpenAI and paste the key in the OpenAI API key field.
Pic. 6
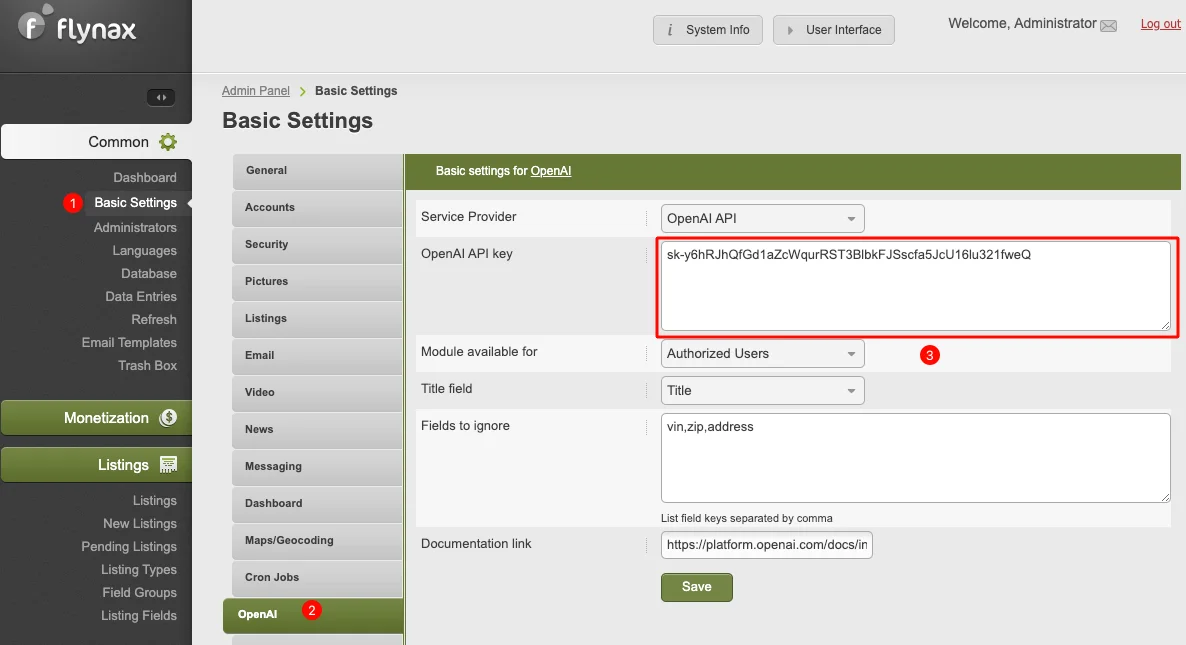
Save the settings.
The plugin is installed and linked to the OpenAI platform. Now you need to configure it.
Configuring the OpenAI plugin #
The plugin is easy to configure and does not require any extra manipulation on the part of the administrator. Let’s go through the settings:
Module available for. As we have already written in one of our digests, the text generation service is provided on a paid basis. If you allow all types of users to generate descriptions, it may lead to significant costs if the traffic is high. Therefore, to spend money wisely on this site service, we have given you the ability to select the type of users to whom this feature will be available:
- Visitors and users. In this mode, the generation of descriptions using AI is available to all users of the site, including visitors. In this mode, the generation costs will be maximum.
- Registered users. The generation service will be available only to registered users. In this mode, the consumption of funds will be moderate.
- Subscription users. It is offered as an additional way to monetize the site and is available to all registered users who have bought a membership plan with the option of generating ad descriptions through AI.
Title field. This field corresponds to the ad title. Since the Title field itself is assembled with data from various fields selected by the administrator when creating the listing title form, it provides the bulk of the information used to generate the description text. Make sure that the Title field is present in the listing form. Otherwise, the text generation option will not work.
Fields to ignore. The setting allows you to create a list of fields that will be ignored during the generation of ad descriptions. You will need to enter the field names that you want to ignore, so you can keep the fields that will be used during generation and that will be passed with the {options} variable for getting more relevant descriptions. You will need to enter field keys, which you can find on the Field Edit page, rather than field names.
NOTICE: The ad title strikes a balance between the maximum number of characters and being descriptive. Long titles look bad, while short titles do not provide the right amount of information to generate text. In cases where the listing form contains many fields that cannot be added to the listing title, it makes sense to provide the values of important fields in a separate array of information in the {options} variable to generate a more accurate description.
Pic. 7
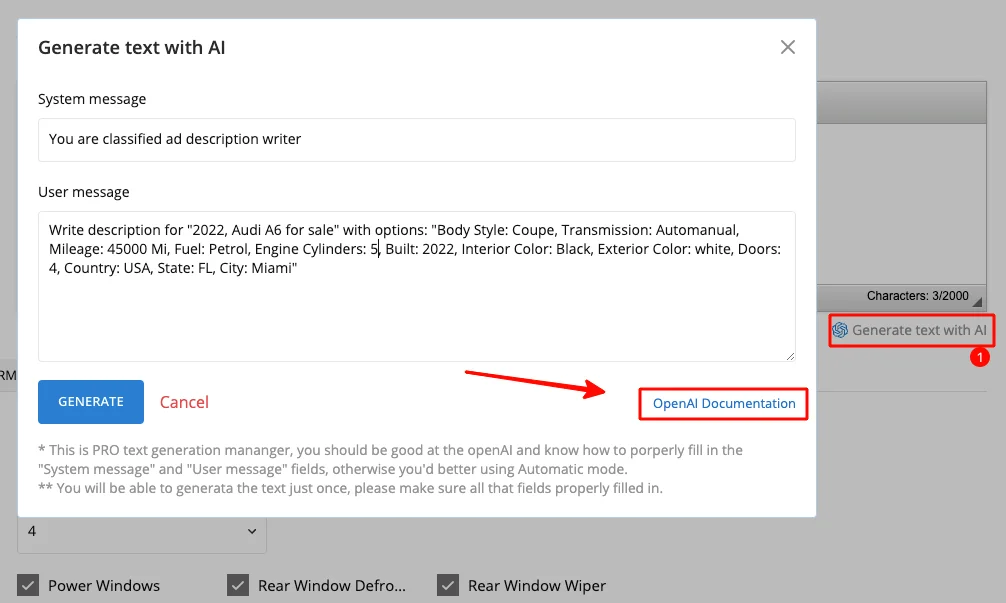
Documentation link. This is a link to the corresponding guide for manual (PRO mode) text generation; the link will be displayed here.
Pic. 8
Plugin phrase management #
The plugin uses two important phrases by default to request text generation on the AI server:
openai_message_system_template. The phrase defines the role of the AI: “Imagine you are a classified ad description writer.”
openai_message_user_template. The phrase describes the task for the AI: “Write a compelling description for “{title}” with the following options: “{options}”.”
If you believe the phrases are not quite accurate or you want to edit them you can do it from the phrase manager:
- Go to Admin panel > Languages > click Search.
- Enter the text openai_message_ to the Phrase field,
- In the Search for field, switch to the Phrase key and click the Search button.
Pic. 9
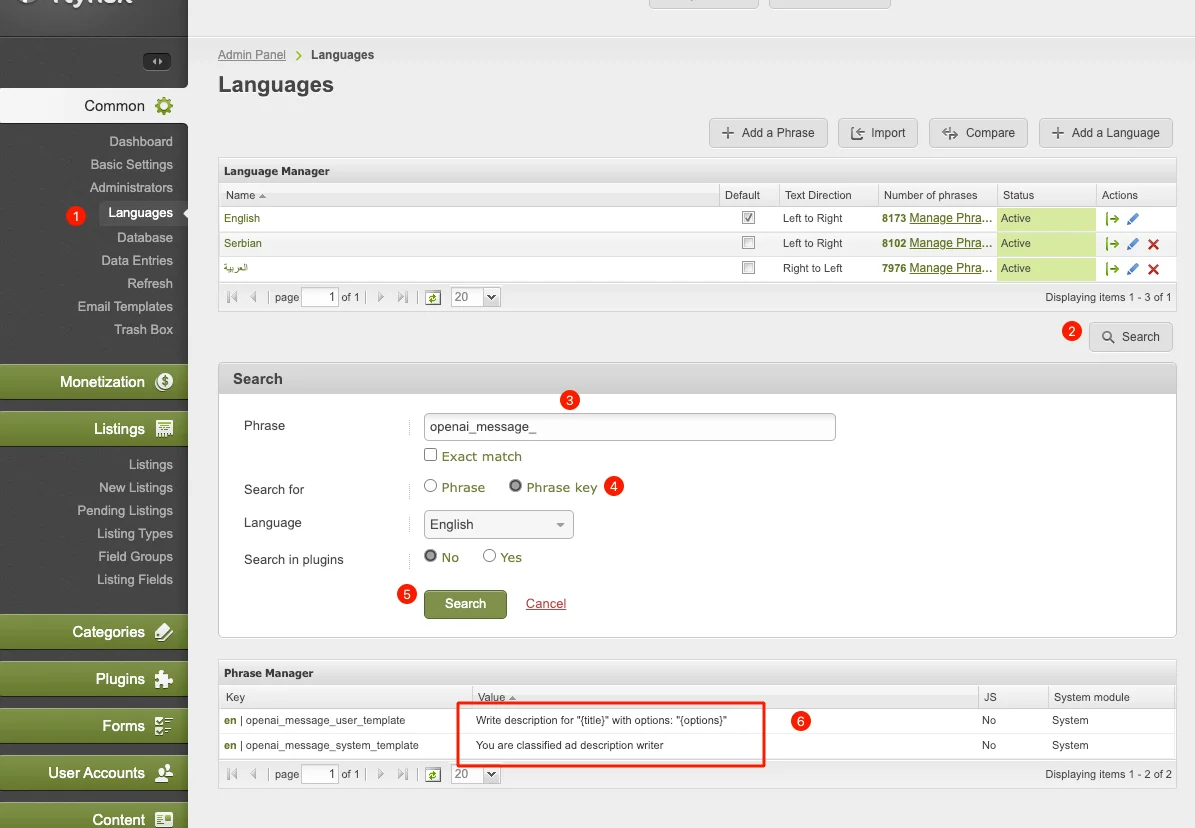
Note that for the phrase with the key openai_message_user_template the {title} variable is mandatory: it will be replaced with the listing title, and the {options} variable will be replaced with the rest of the data from the listing form. The {options} variable is optional. If you think it is not necessary, you can remove it from the text of the phrase.